2 Minute Tutorial: Create Beautiful Watercolor Florals for Surface Design
Dec 14, 2023Do you imagine yourself enjoying an afternoon painting watercolour florals before stopping and thinking: It's too hard. Mine will never look as good as the inspiration!
You are not alone. Many artists hesitate to use this medium but watercolour flowers don’t have to be complex botanical renderings. In fact, the simpler ones are often the most successful.
“It’s really just a matter of knowing which brushes to use, and how to use them,” freelance designer, and Watercolour Florals for Fabric Design course tutor, Angela says. “And it helps if you can let go a little and trust in the process.”
In our Watercolor Florals for Fabric Design course you will learn to use your brushes like a pro, learn to pick the right motifs and give your work wider appeal. Check it out here!
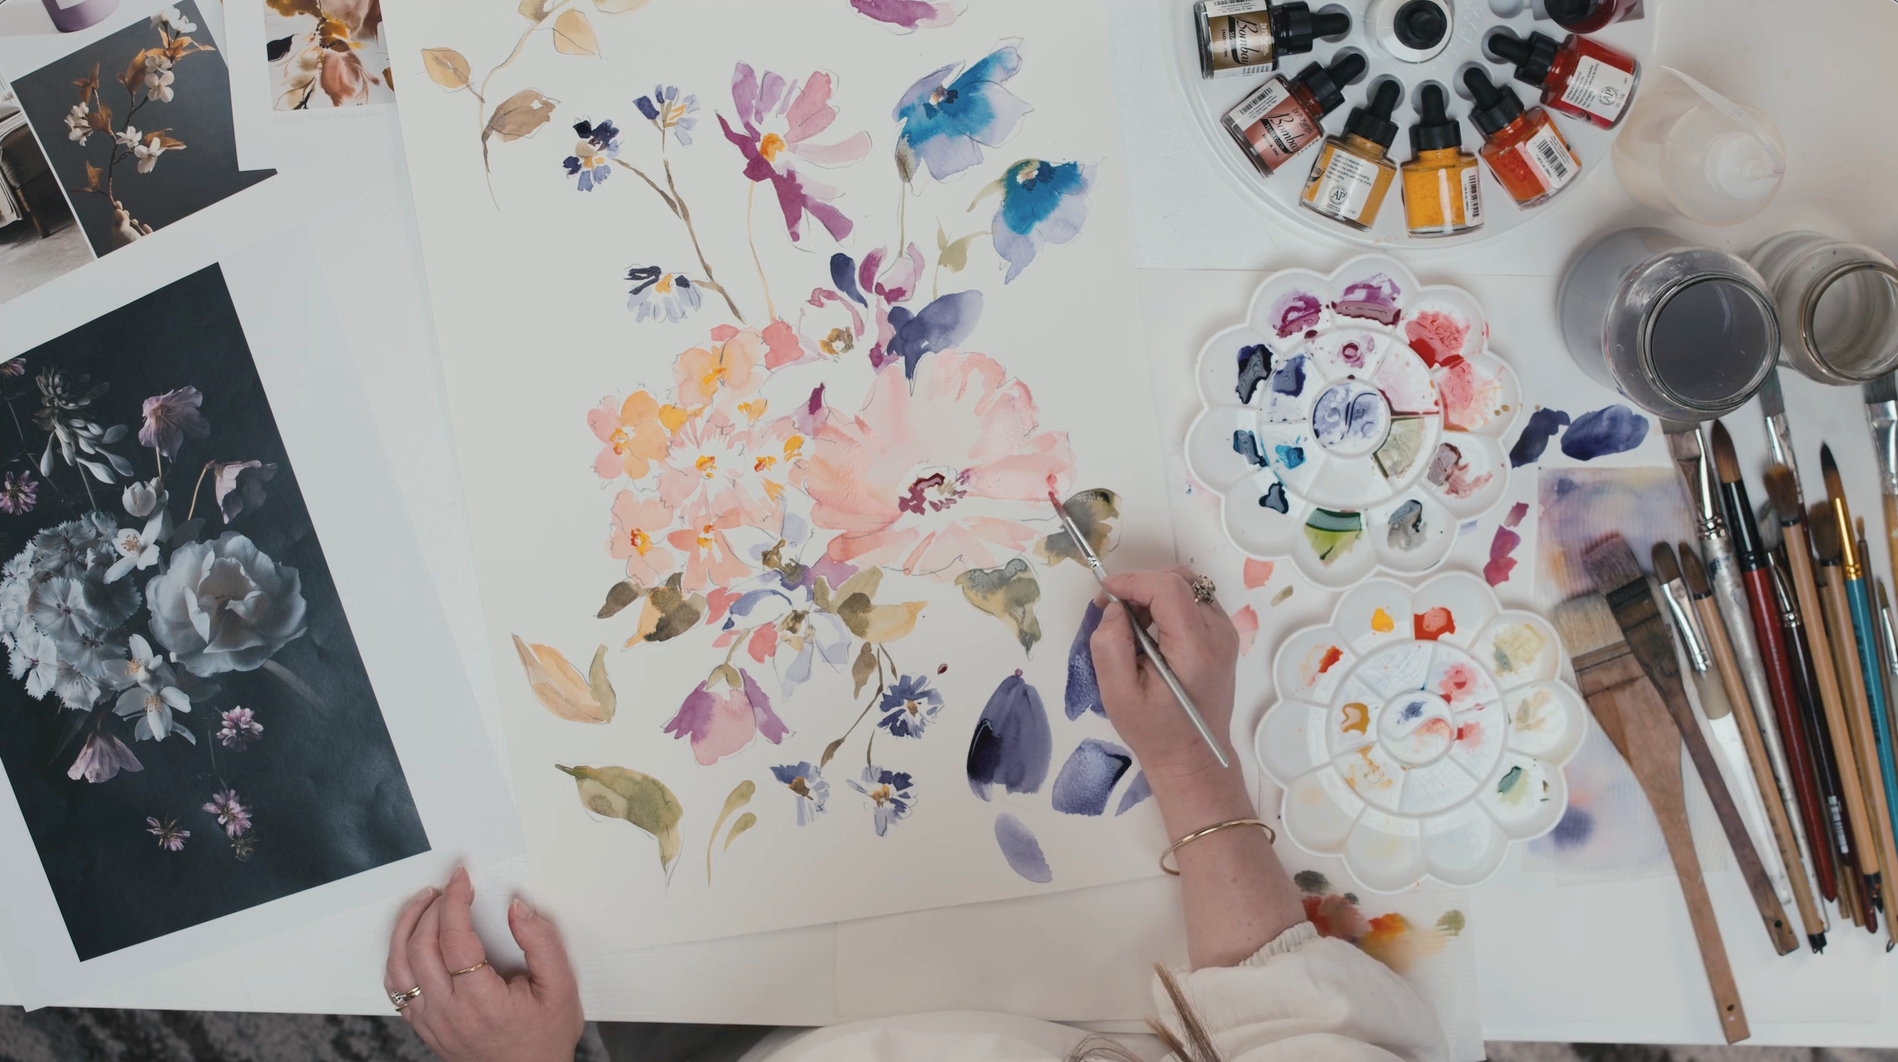
In this tutorial, you will see how Angela works the brushes to create a range of interesting leaves and petals, many of which are created with a single-stroke. And although she uses a photo reference for inspiration, none of her paintings are perfect representations. With this simple style, accuracy is not the point.
So what is? Fun, freedom and minimal detail.
And if you're not seeing results straight away, take heart. For many, this medium requires hours of practice. And it's worth it. When you dedicate the time to the craft you will see an amazing improvement in your work and an incredible lift in your confidence. Those two things play off of one another and your paintings will shine more brightly with every piece.

BEFORE YOU BEGIN
You Need:
-
1 x 1 inch (approx) wide flat brush
-
1 x round brush size 10
-
A3 size watercolour paper, minimum 210 gsm, any tooth of your choice
-
A selection of watercolour paints. Suggested colours: Rose, Cadmium Yellow, Alizarin Crimson, Cobalt Blue, Olive Green, Viridian, Payne’s Grey.
-
A couple of printed references of the flowers and foliage you wish to paint.
STEP 1: CREATE FLOWER PETALS
Take a wide, flat brush, wet and dab it into your watercolour paint. Use loose movements to create the rough shape of the flower, petal by petal. Keep looking back at your reference as you go; notice the curls and the angle of the petal curves. Try not to ‘imagine’ the shape of the flower and paint what you think ‘should be’ there.

Paint with the wide edge of the brush when creating the wider, lower petals in front and a side to side movement, using the narrow edge of the brush for the layered petals in the middle.
Keep adding water to your brush till you get down to the full shape. As you can see in the video, the water will gradually dilute the colour of the paint. Drop a little more colour into the more watery areas for nice bleed effects.
Master watercolour florals
Want to progress your painting skills? Really push them forward? Our in-depth course videos and six-month-long email program (total 12 emails) gives you the core techniques you need to produce professional, painterly textile designs. Watercolour Flowers for Textile Design is one of our most popular courses. Go on and have a little nosey.
STEP 2: Add darker tones
Take a round brush (size 10), wet and dip it into a darker hue (if you started with Rose, use Alizarin Crimson here).

Apply a light pressure – so you are painting with only the tip of the brush – to create some fine strokes indicating the tight folds of petals in the centre of the flower.
STEP 3: ADD AN INTERESTING HIGHLIGHT COLOUR
Observe the angle of your light source or find an unexpected colour in the petals. Paint in that interesting highlight. We have used Cadmium yellow.
Notice how two of the flowers reflect the same highlight and in a similar part of the flower? This helps it look that bit more believable.

STEP 4: PUT IN YOUR STEMS
Swap to a green or greyish colour (we have used Payne’s Grey) and create thin stems using the very tip of the brush and almost no pressure at all. Create a few leaves by starting with light pressure, pushing down on the brush to create width of the leaf before lifting it off again gently. If you’re not confident creating these ‘one stroke leaves’ do a few practice runs on a separate piece of paper.
STEP 5: CREATE SOME SUPPORTING FLOWERS
Create some smaller, supporting flowers for added interest. Choose colours that complement your original flower heads. Angela has made the highlight colour of the roses the focus here in these smaller blooms. She’s brought in Rose as a secondary colour, so it’s like the colours of the two styles are reversed.

QUICK TIPS FOR WATERCOLOUR FLORALS:
-
Leave some white gaps between your leaves. These read as highlights on the flowers and give it an airy, effortless vibe.
-
Create interesting marks with the brush. The more uniform they are, the less realistic your painting will look.
-
Paint every flower head slightly differently. Even if two flower heads look very similar in your photo reference, on closer inspection you will see that they each have unique nuances.
-
Keep a loose wrist. If it’s too hard to relax your death grip in a seated position, try standing at your desk or at an easel. It will automatically free up your range of movement. Try now to hold the handle like a wand instead of a pencil. Watch Angela working with large brushes while standing here.
--
You might also like:
7 Surprisingly Effective Watercolor Tips Our Designers Needed to Hear
3 Tricks Every Artist on a Budget Should Know
Watercolor 101: Don't Do This, Do This!
Stay connected with news and updates!
Join our mailing list to receive the latest news and updates from our team.
Don't worry, your information will not be shared.
We hate SPAM. We will never sell your information, for any reason.